Using video
For using the drone's video, the package “OpenCV2” is used for decoding, preparing and analyzing the images. Using this API to work with the drone’s video-function, it is pretty simple to make yourself familiar with. However, it is still helpful to have some theoretical background knowledge:
The video-stream of Parrot's AR.Drone 2.0 is H.264 or MPEG4 coded (to be exact:
MPEG4.10 respectively MPEG4.2).
Both codecs work with “I-frames”, also known as “key-frames”, which store the whole
information of an image like a photo or picture, and “P-Frames”, which store just the
difference to the preceding frame.I-frames are followed by a certain amount of P-frames.
A P-frame always refers to the preceding frame (I-frame or P-frame) and stores only the
information that differs from this preceding frame. This might be useful to know as
decoding the videostream is pretty complex and needs considerable CPU-usage.
For slow(er) computers for which it is impossible to decode every frame in real-time, it is for example
not possible to decode every second frame, as P-frames refer to the preceding frame.
The result would be a loss of information causing an incorrect and distorted image.
Stylized depiction of a video sequence showing one I-frame, followed by five p-frames
So, decode all or nothing ? Not really, because PS-Drone offers, beside lowering the video-bitrate, the opportunity just to decode the key-frames which are received in a strict period, for up to 95% less CPU-usage.
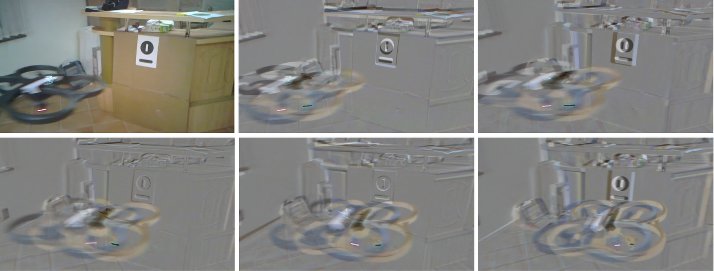
If you like to examine footage of colored objects, it is also helpful to know that both codecs
store their information as progressive 4:2:0 YUV. That means, that every picture is stored
as a whole (no two interlaced half pictures) and pixels are represented by luminance, the
color's saturation and the color's hue. The color slides from red (0) to green (85) and blue
(170) back to (allmost) red (255).
In a square of 2 × 2 pixels, every pixel has its own value for brightness, but all four pixels
share the same value for color. That is due to the fact, that the human eye cannot notice color
related differences as good as differences in luminance. Also different shades of blue are
not as good distinguishable as different shades of green or red, that is why blue is also
stripped down by the compression codecs. These are usual techniques to reduce a video's
data stream and not a special limitation of the drone or PS-Drone.
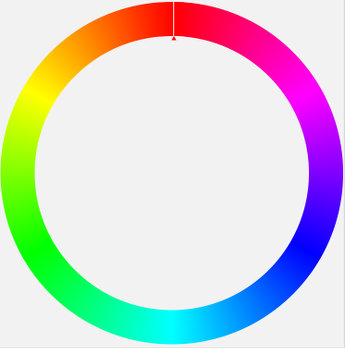 Color wheel |
Depiction of four 4:2:0 YUV coded pixels. Each pixel has a value for luminance; four pixels share the same value for chrominance. |
The H.264-codec is a pretty recent method to reduce and compact a video-stream. The drone sends the pictures for both cameras in resolutions of 1280×720 and 640×360 pixels. The MPEG4-codec is older than H.264; it needs more bandwidth, but also less CPU-power to decode and is suggested for slow computers. The drone's resolution for MPEG4-streams is 640×368 pixels, but the additional 8 lines contain no usable information. The pictures might be sharper, but there is a tendency for “blocking”, if the bit-rate is too low for all the information of the videostream.
The drone's default video-settings are a H.264 coded, 640×360 pixel resolved videostream of the front camera. It is recommended to set the video codec and the resolution before starting the video function and not to change it while it is running.
##### Suggested clean drone startup sequence #####
import time, sys
import ps_drone # Import PS-Drone-API
drone = ps_drone.Drone() # Start using drone
drone.startup() # Connects to drone and starts subprocesses
drone.reset() # Sets drone's status to good
while (drone.getBattery()[0]==-1): time.sleep(0.1) # Wait until drone has done its reset
print "Battery: "+str(drone.getBattery()[0])+"% "+str(drone.getBattery()[1]) # Battery-status
drone.useDemoMode(True) # Set 15 basic dataset/sec
##### Mainprogram begin #####
drone.setConfigAllID() # Go to multiconfiguration-mode
drone.sdVideo() # Choose lower resolution (try hdVideo())
drone.frontCam() # Choose front view
CDC = drone.ConfigDataCount
while CDC==drone.ConfigDataCount: time.sleep(0.001) # Wait until it is done (after resync)
drone.startVideo() # Start video-function
drone.showVideo() # Display the video
##### And action !
print "Useto toggle front- and groundcamera, any other key to stop"
IMC = drone.VideoImageCount # Number of encoded videoframes
stop = False
ground = False
while not stop:
while drone.VideoImageCount==IMC: time.sleep(0.01) # Wait until the next video-frame
IMC = drone.VideoImageCount
key = drone.getKey()
if key==" ":
if ground: ground = False
else: ground = True
drone.groundVideo(ground) # Toggle between front- and groundcamera.
elif key and key != " ": stop = True
The first step to enable video is to switch the drone to the multi-configuration mode,
using setConfigAllID() as mentioned before. Remember to use the command
setMConfig() for changing the drone’s configurations.
After the video-resolution and the video-codec have been set, using the commands
sdVideo() / hdVideo() and mp4Video(), give the drone some time to adjust these
settings (you can either just wait or check for changes of ConfigDataCount). It will
take one to three seconds until the video is fully operable.
Again, it is highly recommended not to alter video-resolution and -codec after the video
function has been started. Nevertheless, it is always possible to set or alter any other
command any time.
As mentioned before, the AR.Drone 2.0 might have a bug when it comes to setting up the video function. Sometimes the request for a change is set and confirmed by the drone (e.g. switching from front to bottom camera), but nothing happens. Unfortunately, there is no workaround for this.
The usage of the video-images is similar to NavData and ConfigData: Every single decoded
video picture is stored as an openCV2-image-object in the variable VideoData, its
timestamp is stored in VideoImageTimeStamp and the time it took to decode
in VideoDecodeTime.
The variable VideoReady shows the status of the video-related processes.
The commands frontCam() and groundCam() allow to change the streamed camera; the commands showVideo() and hideVideo() open and hide a window which shows the drone's actual view.
If the used computer is too slow to decode the drones videostream in real-time, you can
switch to more economic modes by using the commands slowVideo() and midVideo().
Both commands determine that only keyframes are decoded, which also means that the
frame-rate is decreasing; depending on resolution, used camera and codec, it is between 1
to 2 frames per second.
Due to internal buffers, slowVideo() has a higher delay, midVideo() needs more time to process, but has the same delay as fullVideo(). Using slowVideo() reduces the CPU usage for decoding by 92% - 96%, using midVideo() by 33% - 82%.
Please note: it is possible that the video initialization can fail for various reasons. It tries to detect and recover the initialization, but it is suggested to start the video-function before the take off.